DIY Home Tiki Bar: How to Turn a Closet Into A Tiki Hut Mug Display

IMG_3844

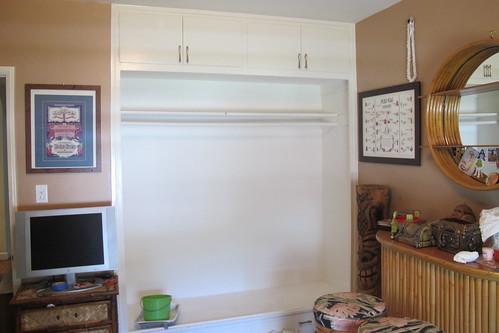
When we moved in to our house, I wanted to turn the guest room into a tiki room, of course. Part of the space ended up having more of a midcentury modern feel, but I also wanted to go all out with some bamboo and thatch so I decided to transform the closet into a tiki hut mug display.

771844235

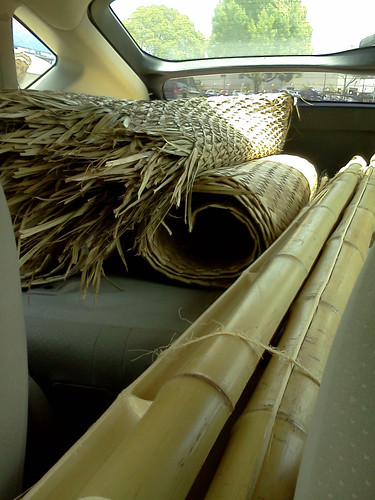
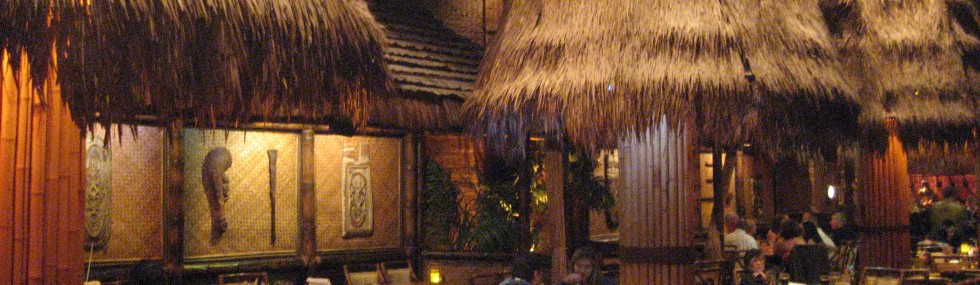
I started by doing a lot of measuring then took a little road trip to Whittier for supplies at Oceanic Arts, the premier purveyors of tropical décor. LeRoy Schmaltz and Bob Van Oosting have furnished many tiki bars and Hollywood productions like “Gilligan’s Island” (and even Walt Disney’s Enchanted Tiki Room!), so it’s worth a pilgrimage even if you aren’t working on a particular project. If you call a few days in advance, they will cut and split the bamboo pieces for you and have it ready to pick up. My haul was three sheets of lauhala matting (one 4′ by 8′ and two 3′ by 6′), a few pieces of two-inch split bamboo, one-inch sea grass braid and two lengths of raincape thatch (3′ by 4′ each).

582076_559764197413849_736593191_n

There’s a useful Tiki Central thread where I learned about putting tape on the back of the matting when you cut it to keep it from fraying. A pair of Husky scissors worked well enough.

IMG_3852

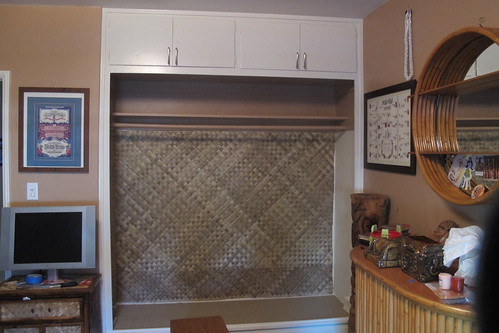
Some people use a staple gun to attach it to the wall but we went with contact cement and it’s held up for a year now. (It probably won’t be pretty when we take it down, but it is just a closet, after all.) The matting didn’t line up totally flush with the edges on the wall, so the segrass braid was perfect for concealing the imperfections. Working with the lauhala matting proved to be pretty labor intensive so we painted the top shelf brown like the rest of the room.

IMG_4263

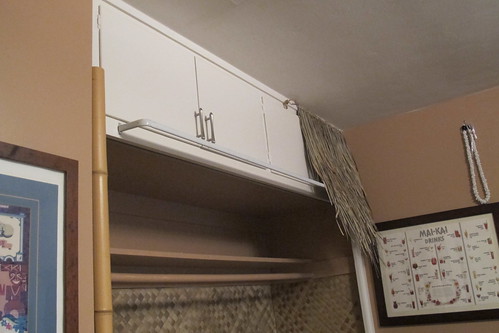
I gotta give credit to my Mom, who helped with this project and came up with a clever way to hang the thatch at an angle — a curtain rod! After trimming the thatch to the desired length and width, I nailed big thumb tacks into the wall every few inches to hang the thatch and then covered up the hardware with more of that seagrass braid.

IMG_4473

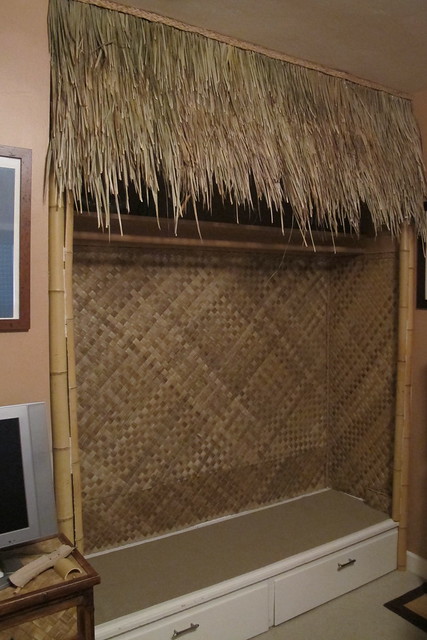
We fit two pieces of split bamboo on each side of the closet frame and super-glued them in place. As you can see, we then discovered that this particular glue didn’t dry clear! We ran some twine between the gaps of the bamboo to disguise it. (You may also have noticed that the bottom piece of matting on the wall doesn’t quite match the shade of the upper piece, but you can’t tell once we put everything in.)

IMG_4604

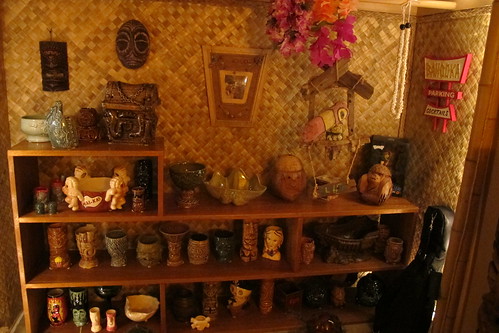
At our previous apartment, we had this giant double-decker wooden shelving unit storing DVDs. I almost pitched it during our move until a friend pointed out that it could house my tiki mugs. As luck would have it, it perfectly fit in the closet. Then came the fun part of setting up the mugs and other things like the driftwood toucan perch by Tiki tOny and the Bahooka tribute sign by Lake Tiki.

IMG_4605

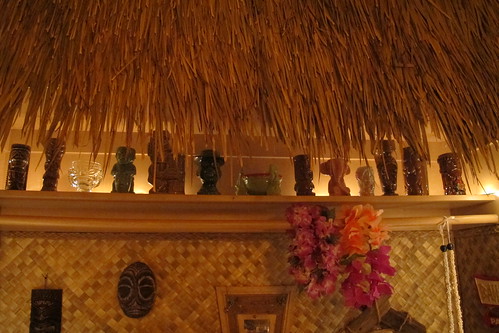
Mr. Hockey rigged some white Christmas lights along the top shelf for quick and easy lighting. He also hooked up everything to one power strip so I have instant mood lighting in the tiki room with the flip of one switch.

IMG_4601

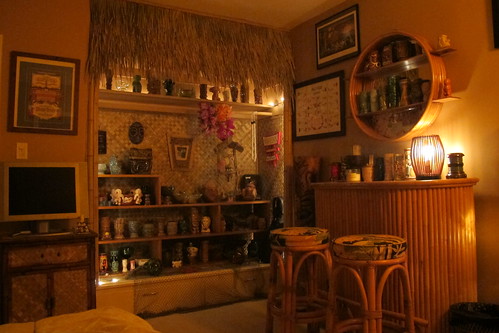
And here’s the finished product! Almost forgot one very important step for Californians (or home tiki bars with cats in residence): make sure to put museum putty on the bottom of those tiki mugs!

Advertisement

Frosty the Cheeseball Man by Charles Phoenix

palms-hotel

If you’re feeling extra festive this holiday season, you may want to try one of the wacky and wonderful Test Kitchen ideas from Charles Phoenix, the “Ambassador of Americana” who promotes fantastic vintage kitsch through books, tours and slideshows. (He also had the honor of riding on the City of Downey’s tiki float in last year’s Rose Parade.) His “food-crafting” projects include the Astro Weenie Christmas Tree (as seen on Conan O’Brien) and the Cherpumple (a cherry, pumpkin and apple pie takeoff on the turducken).

(Photo from Charles Phoenix on Facebook)

IMG_2164

Last year I vowed that we would attempt to make Frosty the Cheeseball Man. This “jolly, happy soul” is made of Velveeta cheese with a layer of cream cheese “snow,” plus olive and bell pepper accoutrements. I named him Tiny Tim because he couldn’t stand up without being propped up by a pretzel stick crutch.

IMG_2166

…Frosty the Snowman
Knew the [electric skillet] was hot that day

IMG_2167

So he said let’s run
And we’ll have some fun
Now before I melt away
[Into processed cheese dip]

IMG_2172

Thumpety thump thump
Look at Frosty go…

Tiki Turkey Dinner by Charles Phoenix

For a Thanksgiving-themed Test Kitchen project a few years back, Charles Phoenix made a Tiki Turkey Dinner complete with a Moai meatloaf centerpiece, Hawaiian bread stuffing, and coconut curry green bean casserole. Maybe next year we should throw a holiday luau!

(Photo from CharlesPhoenix.com)

Related posts:
City of Downey’s Rose Parade Tiki Float
Tiki Holiday Gift Guide 2012
Tiki Wonderland at the Tonga Hut 2010

Tiki Halloween Decorations – Shrunken Head Pumpkin

IMG_1904

I’m not normally very crafty, but when I found instructions on how to make a shrunken head pumpkin I decided to give it a go. It was a fun way to add some Halloween decorations to the tiki room in our new house, and it wasn’t too difficult. The most annoying and time-consuming part was poking holes in the top of the foam pumpkin and threading the raffia through them.

INSTRUCTIONS (via Michaels.com)

Materials List:
Small Gourd – White
Multi-Colored Raffia
Craft Foam – White
Wiggle Eyes
Wooden and Colored Beads-Assorted
Exacto Knife
Pencil
Hot Glue Gun and Glue Sticks

Step: 1
Cut a hole in bottom of Gourd, large enough to fit your hand inside.

Step: 2
Cut a series of 16 holes in the top, in a circular pattern. These should be large enough to thread double-thick strands of raffia through.

Step: 3
Thread double thickness of raffia down through a hole in the top, and then thread it back up through the hole next to it, so the ends of raffia stick up out of the top of the Gourd like hair. Repeat until all holes are filled. You may use different colored raffia to create a custom look.

Step: 4
Gather raffia into a ponytail at the top of ‘head’, and wrap with loose raffia.

Step: 5 (I skipped this step)
Cut out a bone from white craft foam and hot glue behind wrapped area of raffia.

Step: 6
Draw on face with a pencil, and carefully cut out with Exacto knife. You may carve only the surface to create a relief effect, as shown.

Step: 7
Cut holes on top and bottom of mouth line and thread raffia through the holes to create a stitched mouth.

Step: 8
Hot glue wiggle eyes in place.

Step: 9
Select two strands of raffia toward the front of the ‘head’ and string with wooden and colored beads. Tie a knot in the end and trim to desired length.

Do you put up any tiki-themed Halloween decorations? Tiki Central has a thread on Tiki Bar Halloween Decor that can give you more ideas. Happy Halloween!

Related Posts:
Enchanted Tiki Room Painted Pumpkins at Disneyland
Halloween 2010 Art Show at the Tonga Hut
Spooky Tiki at Halloweentown in Burbank